> For the complete documentation index, see [llms.txt](https://soups-misc.gitbook.io/fpga-training/llms.txt). Markdown versions of documentation pages are available by appending `.md` to page URLs; this page is available as [Markdown](https://soups-misc.gitbook.io/fpga-training/vivado-kai-fa-liu-cheng-block-design.md).
# VIVADO開發流程(Block design)
本篇整理一些網路文章做整理與教學講解,以xilinx vivado作為開發環境,建立一個簡單的zynq mp spi XSA流程說明之
## 1. Create project
這個段落可參考[vivado開發流程(Simulation)](/fpga-training/vivado-kai-fa-liu-cheng-simulation.md)同一個段落,簡單來說就是建立一個空專案並進入開發介面.
## 2. Create block design
* 本小節介紹新增block desgin以及新增ip之簡介
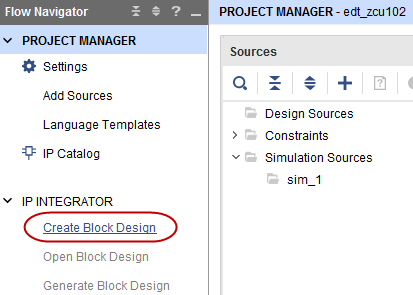
* 首先點選create blok diagram,並且命名後進入open block design
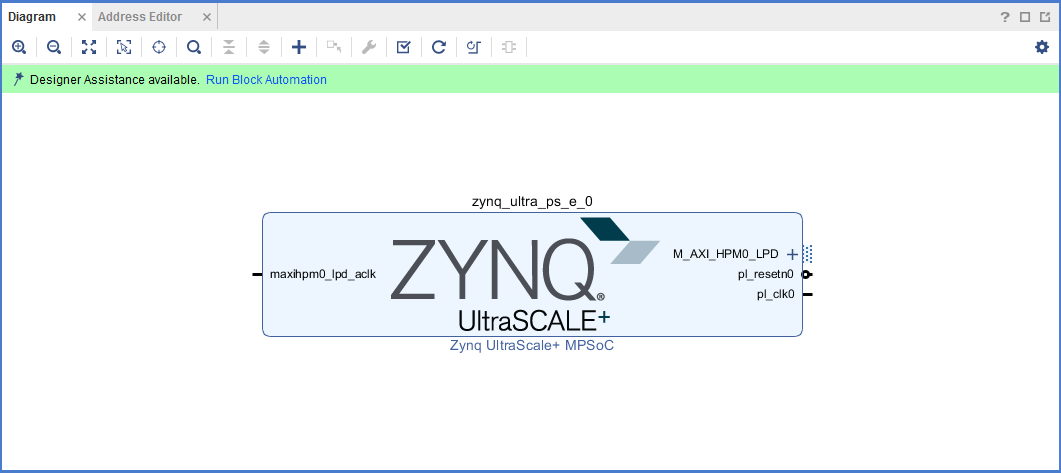
點選 Run connection automation 將所有都打勾,option的部分尚不需要修改
* 更新接線後可能還會再出現Run connection automation字樣,點選使其自動將尚未完成拉線的clk等自動連接完成,綠色欄位的Run connection automation會消失,如下圖
* Run block automation在這裡不需要勾選產生相關pin
過程中會出綠色欄位的Run connection automation會消失
* 過程中會問你是否要新增address 點選Yes,並可以在address editor,map檢查
* 完成拉線後使用validate design做初步的拉線確認,這裡功能主要檢查clock是否完成接線,或是頻率對不對
* Save block diagram
## 3. Out of context per IP and HDL warpper
* 這個小節主要是針對新增的每個ip做初步的合成測試,並且合併成一個module。
* 在source視窗選擇針對剛剛建立的block design(在這裡是design1.bd),右鍵點選gernerate output products。
* 選擇out of context per ip,也就是針對每個ip各別做一次合成
* on local host就是用你當前的系統做合成,number of job使用的cpu核心數,使用越多越快完成計算,建議使用此電腦最大核心數-1的數量,保留一核做系統運作
* 可以從Design run觀察運作狀態,有時候會出現syntha error,但後面使用Run synthsis仍可以運作,
* 右鍵選擇Create HDL wrapper,使用"Let vivado manage wrapper and auto-update"即可
* 產生好之後會出現一個.v檔,粗體字表示已經set as top,沒有要右鍵將其set as top
* 完成後即可進行Run synthesis
## 4.Run synthesis
* 從Flow navigator找到Synthesis,執行合成
* 視窗中option欄位中的number of job為使用的CPU核心數,若要盡可能使用全系統運作建議選擇最大值-1,保留一核進行作業系統運行
* 完成合成後,可進入IO ports頁面選擇對應腳位,本區區塊需參考所使用的IC SPEC
## 5.Run implentment
* 從Flow navigator找到Implement執行,或者Synthesis完成後會自動問你要不要往下執行Implement
* Implement完成後開啟該分頁可於Device頁面當中確認接線,如下圖
## 6. Generate Bitstream
* 從Flow navigator找到generate bitstream執行,或者implement完成後會自動問你要不要往下執行generate bitstrea
## 7. export XSA
* 要與vitis或petalinux整合,需再將bitstream轉換成xsa檔
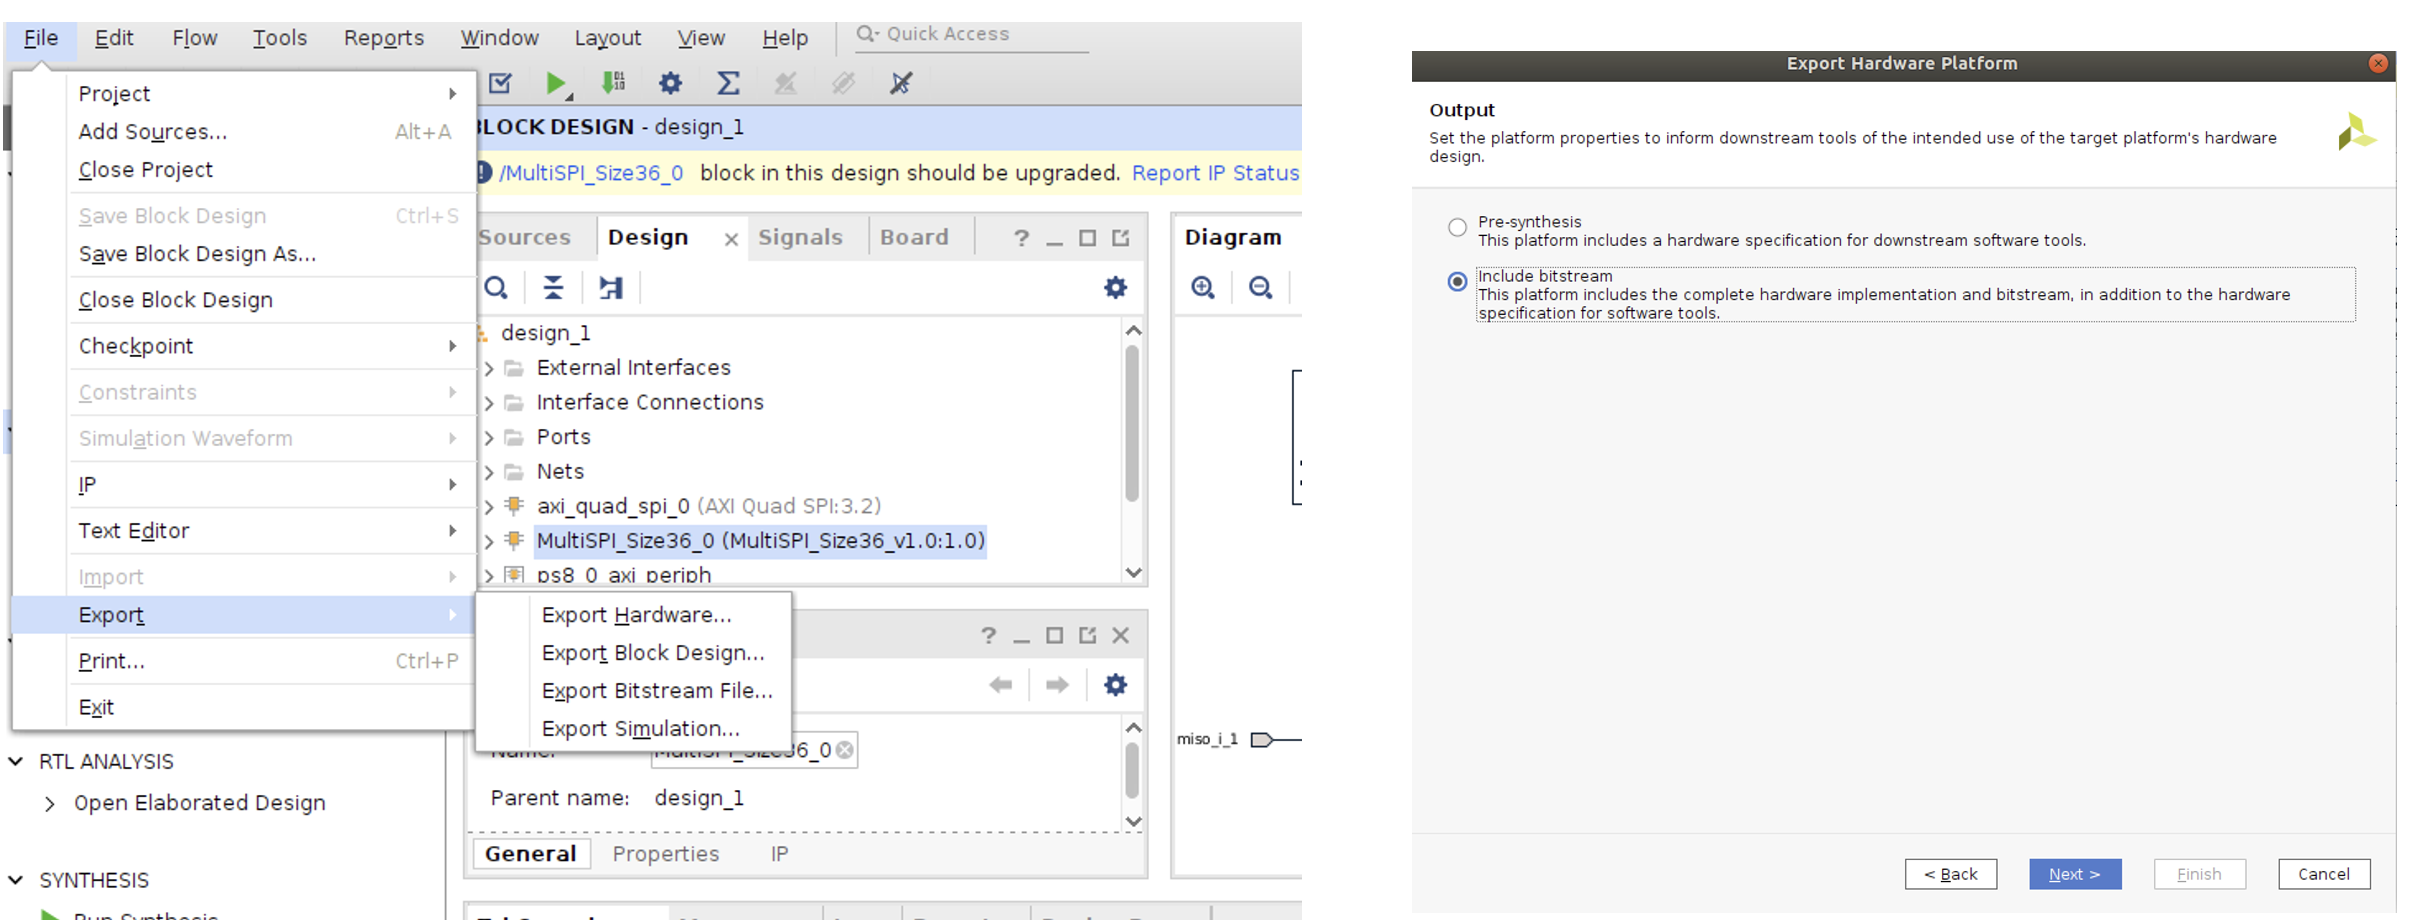
* File -> Export Hardware(產生XSA),要選include bitstream將剛剛產生的檔案
---
# Agent Instructions
This documentation is published with GitBook. GitBook is the documentation platform designed so that both humans and AI agents can read, navigate, and reason over technical content effectively. Learn more at gitbook.com.
## Querying This Documentation
If you need additional information that is not directly available in this page, you can query the documentation dynamically by asking a question.
Perform an HTTP GET request on the current page URL with the `ask` query parameter:
```
GET https://soups-misc.gitbook.io/fpga-training/vivado-kai-fa-liu-cheng-block-design.md?ask=
```
The question should be specific, self-contained, and written in natural language.
The response will contain a direct answer to the question and relevant excerpts and sources from the documentation.
Use this mechanism when the answer is not explicitly present in the current page, you need clarification or additional context, or you want to retrieve related documentation sections.